How to Convert PDF Files to Word (.doc, docx) Format

No Comments

Portable Document formats aka PDF is an entirely different document from word (.doc, .docx) file formats. If you’ve tried opening pdf files on word application, you would notice that the text disappears and what displays on your word application is just some codes that looks very useless to user. So, if you think opening PDF files with word application or renaming the .pdf extension to .doc, .docx is the key, please re-think.

With the help of this file converter app I’ll be revealing, you got just 5 steps to follow on conversion process and gbam, you’re done. So, if you ever wanted to know the PDF to word conversion process, then this guide is your best shot.

So before I proceed, let me give you a sample of what I get before file conversion and after conversion when opening the pdf on word application. The no.1 image as described below is the non-converted pdf file launched on word application and the n0.2 is the converted pdf to word file launched on word application. You’ll notice trashy codes on first image and correct text on second image.

How to Convert PDF Files to Word (.doc, docx) Format

1.       Firstly, visit the PDF to word converter page and you’ll get to a window as displayed below.

2.       After that, hit the select file+ button to select the PDF file you wish to convert to word document, as described in the image below.

3.       Once you’ve selected the file, open it and you’ll get a pop window; simply select the first option which is “following” as described in the image below.

4.       Next, click n the start button to begin conversion process. Conversion process would be started and you’ll see the progress on the progress bar as described in the image below.


5.       Once the PDF to word conversion process is completed, a download link to the converted file would be available, as seen in the image below.

6.       Hit the download button to download the word file, open the file and you’ll get the corresponding text on the PDF to the word. No more trashy codes.

How to Install a Vehicle Tracker and Monitor your Automobiles Remotely

2 comments
NTO GPS Car Tracking device lets you track, control and monitor all kinds of vehicles with ease. It comes with a SIM Card slot and built-in battery to serve as an extra layer for recovering your vehicles in case of theft.

NTO GPS car tracker does not only come with a hardware that’s highly scalable, but its equipped with proper cabling and advanced software features.
I got and helped install one for a friend recently, and thought it wise to come up with this post on seeing how many things one can do with it.

Why a Car Tracker?

Tracking and surveillance devices have been in existence for so long and comes in various forms. There are good reasons one might want to add a tracking device to his road vehicle, fleets, truck and/or other automobiles.

Chief among these reasons bothers on security and safety. Most automobile trackers lets you monitor speed, location, power failure and lots more.
With a modern car tracker, you can control lots of vehicle functions remotely. Functions such as fuel management, fleet management, distance Calculation and speed control can be done remotely.
Above all, car tracking devices helps in speedy recovery of stolen vehicles as you can easily cut the gas supply remotely, turn on emergency alarm, track the vehicle location or completely lock the car’s ignition system remotely.
It well complements the built-in security mechanism in modern vehicles.

NTO GPS Car Tracker Features


This copy we bought for the installation guide is black, comes with a SIM-card slot, GPS/GSM Antenna, Wires, Relay, Microphone  and  250mAh battery.
The functions can be activated via SMS, DTMF, and/or GPRS commands. The default operation password for this copy is 8888#. It must be changed to a new one after the activation.
The features and functions includes and not limited to:-
  • Smart phone apps control.
  • Fleet management platform.
  • GPS system and precise location tracking.
  • Vibration alarm.
  • Geo-Fences.
  • SOS.
  • LED Indicator.
  • Emergency monitor.
  • Remote fuel control.
  • Power failure alarm.
  • Over speed management.
  • Vehicle maintenance alarm.

How to Install a Vehicle Tracker

This section is created to guide you on how to install a vehicle tracker by yourself or with the help of an Auto-electrician.

It is a straight-forward guide, and at such can be handled by anyone with a strong technical background and good technical know-how on screwing and/or UN-screwing nuts.
This tutorial can be used for NTO GPS/GPRS devices and/or any other car tracking devices that comes with a built-in battery.
N/B: You can buy NTO GPS car tracking device wholesale from Alibaba or retail from Aliexpress online shopping mall.
Step 1
UN-box and prepare the device:  This is the first step in getting your car tracking device setup correctly. Remove the device from the packaging and unseal the various wraps and connecting cables.
Step 2
Install Sim card and Battery: This part is quite easy to complete. All you need do here is
  • Open the frond cover and pull out the PCBA board.
  • Insert the SIM card to the SIM slot.
  • Plug the battery to the socket.
  • Put the PCBA board and frond cover back.
N/B: It is advised that you leave the button to power off mode while installing and unloading the SIM card.
Step 3: Open the vehicle’s cover plate as shown below, and follow after the detailed circuit instructions.

Step 4: Turn on the device, and monitor the led indicator to make sure that everything is working as described in the user’s manual.
Step 5: Screw back the loosened points appropriately and install the mobile app on your preferred device.

 NTO GPS Application: How to track & Monitor your Car via PC or Mobile

Assuming that the gps tracker was installed correctly, this section is meant to guide you on how to track/monitor your vehicle via USSD codes (feature phones), smart phone app and/or PC browser.

You are required to sign up for an account with NTO GPS monitoring server before first use. You can do this from the English version of their website (http://www.ntogps.com/DefaultEn.aspx) or via the smart phone app’s interface.
Once an account is created, you can add as many vehicles as possible and track them with PC, mobile app and/or USSD codes.

Tracking via a Personal Computer (PC)

Tracking via PC is done by visiting the NTO GPS car tracker’s tracking system at http://www.ntogps.com. Once the page is opened, fill-in the form with your email address and password.
Click the login button and select the car you’ll like to monitor from the left side-bar. You can add one from the options, if it is your first time of logging in to the web app.
Fleet management, car history and precision monitoring is best done with the PC browser app.

Tracking via the Smart Phone App

This is possible for Android, iOS and Blackberry 10 users. Simply search for “NTOGPS” in the app store to install or manually download the raw installation file (.apk) from their tracking platform.
  • Launch the app after installation.
  • Enter email address/password to login.
  • Click on the car’s icon to add a vehicle and numbers to contact for; when it gets stolen or falls to a wrong hand, emergency and alerts.
  • Save and play around the other buttons to familiarize yourself with the app’s functions.

Tracking via USSD Code

This method of monitoring can come in handy for those in rural areas or areas with poor GPRS connectivity. All you need do is enter some set of commands + (plus) the default system password or the password you set.
Eg. Sending 8888#08# as an SMS to the phone number on the GPS car tracker is going to return the vehicle’s location (correct to 5m) to you.
Other codes and USSD instruction is contained in the device user’s manual.
In Conclusion:
Although, we’d prefer a built-in battery with higher capacity than the installed 250mAH, we must affirm that the tech heads at Nengtong did a good job here. The device worked fine with the built-in battery, and other features we tested were amazing for the price.
We strongly believe that this tutorial will help you install NTO GPS car tracker or any other vehicle tracking device with similar spec and features.
Do not fail to get in touch (via comments), if you encounter any problems or would like to know more about vehicles and tracking devices

How to flash any Android MTK Device using SP Flash Tool

2 comments
SP Flashtool is one of the very useful softwares in flashing MTK Android devices because of its simplicity and convenience. Even a person with a low or little computer knowledge can use SP flashtool and solve software problem of hang on logo, restarting, auto turn on internet connection, auto turn on wifi connection, auto apk installing, auto gone balance, pattern lock, screen lock and others.
This tutorial covers the basic aspect on how to flash any MTK android device step by step to help you in flashing the stock rom or custom rom of your phone. All that is required here is your utmost attention and a USB Cable to use in addition with the phone you want to flash.

ATTENTION

Before you proceed to flash any kind of device its highly imperative to back up your important and personal files like contacts, music, videos, picture and other stuff you may need, so as not to loss your data because the process is irreversible. If your phone is unable to boot, then no need to back up because you can't get a chance to do so. Also you need to charge your device at a minimum of 80% to avoid interruption of battery in the process of flashing your phone. Don't also forget to take into consideration that you will borne any mistake encountered in the process of flashing your device because we take no responsibility if you damage your phone mistakenly or otherwise.

How to Flash Stock Rom Using SP FlashTool

 
STEP 1: Download the specific firmware for your android phone by searching on Google

STEP 2: Download SP Flash Tool from here

STEP 3: Open the SP Flash Tool you downloaded from the link above. It is compressed in a zip file, simply extract it onto a folder on your PC.
extracting sp flash tool

Remove the battery from the phone and slot it back in without booting the phone (If the battery is inbuilt then simply switch if off). Also, ensure there's a formatted SD card in the phone (if there's an SD card slot)

Open the Extracted folder and run SP flashtool as an administrator
running sp flash tool as an administrator


Click on Scatter-loading by the right
loading scatter file on sp flashtool

In the window that pops up, select the scatter file for your phone model then click Open (scatter file is a text file with the word "scatter" in its name )
selecting scatter file to load
A list with ticked boxes should appear in SP flash tool (preloader, mbr, ebr etc)
tick boxes on sp flashtool
Once the file(s) you wish to flash is (are) ticked, click Download (with an arrow above it) 
click on download to start flashin phone

Stop should now be prominent while other options should be grayed out, Connect the switched off phone (with battery inside) to the PC via USB cord, a progress bar should start running

flashin in process
Wait till you get a Success message (green circle with OK), do not interrupt before then
flashing completed with a success message

Disconnect the phone, remove the battery for 15 seconds (if removable), slot it back in then power up the phone.
Ensure to do a factory reset in recovery mode to clear any errors

How to flash any Android MTK Device using SP Flash Tool

No Comments
SP Flashtool is one of the very useful softwares in flashing MTK Android devices because of its simplicity and convenience. Even a person with a low or little computer knowledge can use SP flashtool and solve software problem of hang on logo, restarting, auto turn on internet connection, auto turn on wifi connection, auto apk installing, auto gone balance, pattern lock, screen lock and others.
This tutorial covers the basic aspect on how to flash any MTK android device step by step to help you in flashing the stock rom or custom rom of your phone. All that is required here is your utmost attention and a USB Cable to use in addition with the phone you want to flash.

ATTENTION

Before you proceed to flash any kind of device its highly imperative to back up your important and personal files like contacts, music, videos, picture and other stuff you may need, so as not to loss your data because the process is irreversible. If your phone is unable to boot, then no need to back up because you can't get a chance to do so. Also you need to charge your device at a minimum of 80% to avoid interruption of battery in the process of flashing your phone. Don't also forget to take into consideration that you will borne any mistake encountered in the process of flashing your device because we take no responsibility if you damage your phone mistakenly or otherwise.

How to Flash Stock Rom Using SP FlashTool

 
STEP 1: Download the specific firmware for your android phone by searching on Google

STEP 2: Download SP Flash Tool from here

STEP 3: Open the SP Flash Tool you downloaded from the link above. It is compressed in a zip file, simply extract it onto a folder on your PC.
extracting sp flash tool

Remove the battery from the phone and slot it back in without booting the phone (If the battery is inbuilt then simply switch if off). Also, ensure there's a formatted SD card in the phone (if there's an SD card slot)

Open the Extracted folder and run SP flashtool as an administrator
running sp flash tool as an administrator


Click on Scatter-loading by the right
loading scatter file on sp flashtool

In the window that pops up, select the scatter file for your phone model then click Open (scatter file is a text file with the word "scatter" in its name )
selecting scatter file to load
A list with ticked boxes should appear in SP flash tool (preloader, mbr, ebr etc)
tick boxes on sp flashtool
Once the file(s) you wish to flash is (are) ticked, click Download (with an arrow above it) 
click on download to start flashin phone

Stop should now be prominent while other options should be grayed out, Connect the switched off phone (with battery inside) to the PC via USB cord, a progress bar should start running

flashin in process
Wait till you get a Success message (green circle with OK), do not interrupt before then
flashing completed with a success message

Disconnect the phone, remove the battery for 15 seconds (if removable), slot it back in then power up the phone.
Ensure to do a factory reset in recovery mode to clear any errors

How to Chat with GTBank Customer Care online to Solve your Banking Problems

No Comments
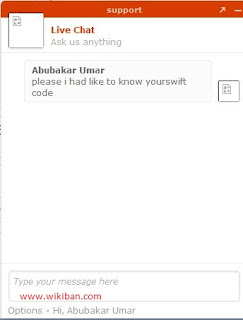
Everything is becoming easier and simple in terms of this technological development. Every company or banking sector or organization is adopting various online technique to promote its good and services. GTBank is also bringing out the most safe and convenient way to solve your banking problems by just chatting with them online. if you don't forget MTN and Etisalat also had this platform before to enable your solve your problems with them. Well, for GTbank is actually very simple and easy.
how to chat with gtbank online

How to Chat with GTBank Customer Care fast and Easy

Just get on to http://www.gtbank.com on your browser,
And then check the Right Bottom corner for the chat window and click on it to maximize and input your Name, E-mail, Phone number, subject and message to initiate the chat.


Am waiting for other Banks like FirstBank and Zenith Bank to join the queue also

How to Easily Root Tecno W3

No Comments
Tecno W3 is one of the latest tecno devices running Android 6.0 (Marshmallow) making it not really supporting Apks for rooting. As you all know that rooting your android phone could really void the warranty of your device and as such, the consideration of doing so lies on you alone and all other incidents and/or accidents make it fully your responsibility. All Credit goes to team hovatek for porting up the TWRP for tecno W3.
With everything on ready let move on the process on how to root your tecno W3 easily without having much stress.
how to root tecno w3

How to Root Tecno W3

  1. Install VCOMM Drivers on your PC Here
  2. Download SuperSu 2.66 .zip Here
  3. Copy the SuperSU.zip file to both your memory card and phone internal storage
  4. Download TWRP Here
  5. Switch off the device
  6. Flash the TWRP Recovery.img to the phone using sp flashtool, if you don't know how to check here 
  7. Boot the Device into Recovery mode using Vol up + Power Button
  8. In TWRP, if you get a prompt asking you to swipe to allow TWRP modify the system partition, then go ahead and swipe. To swipe, place your finger on the green circle then slide it to the right
  9. In the Recovery, tap Install
  10. Browse to the location of the superSU and select it
  11. Swipe to confirm flashing of SuperSU.zip and wait till flashing is complete
  12. reboot the device
  13. confirm the status of the root by installing and running root checker
 Any problem encountered, Drop it via the comment box below